2015 Jeep Cherokee: Owner’s Manual & Comprehensive Guide
Discover essential resources for your 2015 Jeep Cherokee, including a free manual viewable online in PDF format or downloadable directly to your device.
Access complimentary printed manuals via phone (1-877-426-5337 US/1-800-387-1143 Canada) or through a local dealership for optimal ownership experiences.
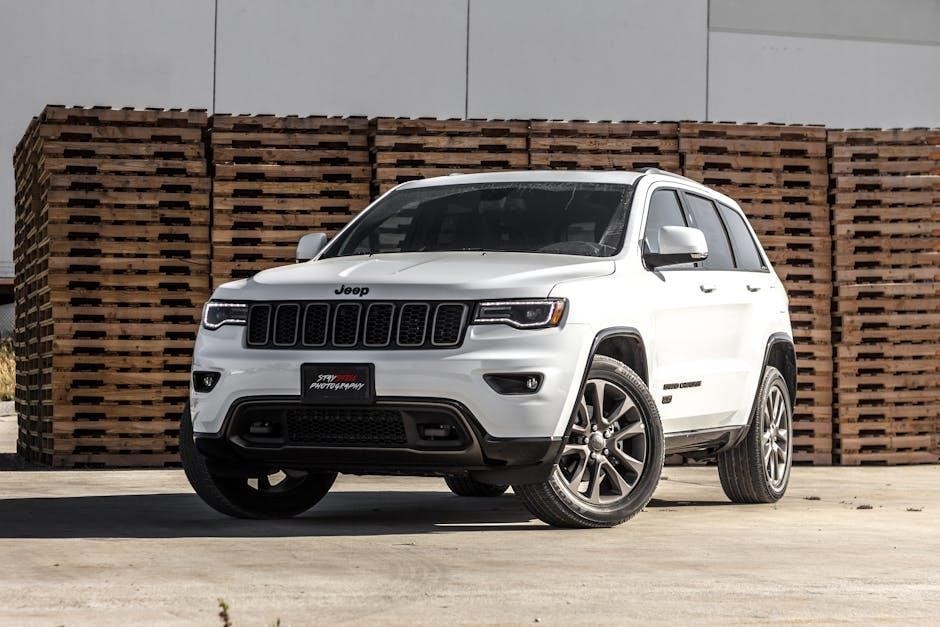
The 2015 Jeep Cherokee represents a significant evolution in the iconic brand’s lineup, blending traditional Jeep capability with modern comfort and technology. This comprehensive guide serves as your primary resource for understanding and maintaining your vehicle, ensuring a rewarding ownership experience. Locating your owner’s manual is crucial, and fortunately, a free PDF version is readily available online for convenient viewing or download.
Whether you’re a seasoned Jeep enthusiast or a first-time owner, this manual details everything from basic operation to advanced features like the Uconnect system and 4×4 capabilities. Should you prefer a physical copy, Jeep offers complimentary printed manuals – including those for navigation and warranty – to the original retail owner. Simply contact them via phone at 1-877-426-5337 (US) or 1-800-387-1143 (Canada), or visit your authorized Jeep dealer. Understanding your vehicle’s standard equipment is also simplified through the Chrysler Equipment Listing Online tool.
Understanding Your Vehicle: Key Features
The 2015 Jeep Cherokee boasts a range of features designed for both on- and off-road adventures. Your owner’s manual is the key to unlocking these capabilities, providing detailed explanations of systems like the available 4×4 drivetrain and the Uconnect infotainment system. This manual, accessible in PDF format online, details operation of everything from seating adjustments to navigation settings.
Key features include multiple engine options, offering a balance of power and efficiency, and sophisticated transmission systems tailored to enhance performance. The 2015 Cherokee also provides various comfort features, all explained within the comprehensive manual. Remember, if you’re unsure about any aspect of your vehicle, referencing the manual is the first step. For confirmation of standard equipment, utilize the Chrysler Equipment Listing Online tool. A printed copy of the manual can be requested by calling 1-877-426-5337 (US) or 1-800-387-1143 (Canada).

Accessing Your 2015 Jeep Cherokee Owner’s Manual
Easily find your 2015 Jeep Cherokee manual online in PDF, view it digitally, or request a complimentary printed copy through Chrysler’s customer service.
Downloading the 2015 Jeep Cherokee Owner’s Manual in PDF Format
Obtaining a digital copy of your 2015 Jeep Cherokee owner’s manual in PDF format is remarkably straightforward, offering convenient access to vital vehicle information at your fingertips. Numerous online resources provide this service, allowing you to view and download the manual directly to your computer, tablet, or smartphone.
This digital format enables quick searches for specific topics, eliminating the need to sift through pages. You can easily print sections for reference during maintenance or repairs. The PDF version mirrors the printed manual, containing detailed explanations of all vehicle systems, features, and safety precautions. It’s a practical solution for those who prefer digital documentation or require access to the manual while on the go. Ensure the source is reputable to guarantee a genuine and accurate copy of the 2015 Jeep Cherokee owner’s manual.
Viewing the Manual Online
For immediate access to your 2015 Jeep Cherokee owner’s manual, utilizing the online viewing option is a convenient and efficient choice. Several websites host digital versions of the manual, allowing you to browse its contents directly within your web browser without the need for downloading or installation.
This online viewing experience often includes features like a searchable index and clickable table of contents, streamlining your navigation. You can zoom in for detailed diagrams and illustrations, enhancing comprehension. The full-screen viewing mode provides an immersive reading experience, mimicking the layout of the printed manual. This method is ideal for quick reference or when you need to consult the manual on a device with limited storage space. Ensure a stable internet connection for optimal performance while viewing the 2015 Jeep Cherokee manual online.
Requesting a Printed Copy of the Owner’s Manual
If you prefer a physical copy of the 2015 Jeep Cherokee owner’s manual, Chrysler offers a complimentary service for first-time registered retail owners. Obtaining a printed manual is straightforward and ensures you have a readily available resource, even without internet access or a digital device.
To request your free printed copy, simply contact Chrysler customer care directly. You can reach them by phone at 1-877-426-5337 (for owners in the U.S.) or 1-800-387-1143 (for owners in Canada). Alternatively, you can visit your local Jeep dealership and inquire about obtaining a printed manual through their service department. Be prepared to provide proof of ownership, such as your vehicle registration or purchase agreement, to verify your eligibility for this complimentary service. This ensures you have a tangible guide for your 2015 Jeep Cherokee.

Vehicle Specifications & Capabilities
Explore the 2015 Jeep Cherokee’s diverse engine options, transmission systems, and available 4×2 or 4×4 drivetrain configurations for optimal performance.
Understand its robust capabilities!
Engine Options and Performance
The 2015 Jeep Cherokee offered a compelling range of engine choices designed to cater to diverse driving needs and preferences. The standard engine was a 2.4-liter MultiAir I4 engine, delivering a balance of fuel efficiency and adequate power for everyday driving situations. For those seeking enhanced performance, a potent 3.2-liter Pentastar V6 engine was available, providing significantly more horsepower and torque.
This V6 option allowed for improved acceleration and towing capacity, making it ideal for drivers who frequently undertake longer journeys or require the ability to haul additional cargo. Both engines were paired with a responsive nine-speed automatic transmission, contributing to smooth gear changes and optimized fuel economy. The Cherokee’s performance characteristics varied depending on the chosen engine and drivetrain configuration, offering a versatile driving experience tailored to individual requirements.
Transmission Systems
The 2015 Jeep Cherokee exclusively featured a sophisticated nine-speed automatic transmission across all engine options, representing a significant advancement in drivetrain technology. This transmission was engineered to enhance both fuel efficiency and driving performance, offering a wider range of gear ratios compared to traditional automatic transmissions.
The nine-speed design allowed the engine to operate within its optimal power band more frequently, resulting in improved acceleration and reduced fuel consumption. Drivers could also utilize a manual shift mode, providing greater control over gear selection for more engaging driving experiences. The transmission’s smooth and precise shifting characteristics contributed to a comfortable and refined ride quality. This advanced transmission system played a crucial role in maximizing the Cherokee’s overall efficiency and responsiveness.
Drivetrain Options: 4×2 and 4×4
The 2015 Jeep Cherokee offered customers a choice between two distinct drivetrain configurations: 4×2 (front-wheel drive) and 4×4 (four-wheel drive). The 4×2 system provided a balance of fuel efficiency and everyday driving capability, suitable for primarily on-road use. However, the 4×4 systems were where the Cherokee truly showcased its legendary Jeep capability.
Three different 4×4 systems were available, ranging from the Active Drive I to the more advanced Active Drive II and Trailhawk systems. Active Drive I automatically switched between two-wheel and four-wheel drive as needed, while Active Drive II added a low range for enhanced off-road performance. The Trailhawk system included additional off-road features like increased ground clearance and skid plates; These options allowed buyers to tailor the Cherokee’s drivetrain to their specific needs and driving conditions.

Interior Features & Technology
The 2015 Jeep Cherokee boasts the innovative Uconnect system, offering seamless integration of infotainment and navigation features for a connected driving experience.
Uconnect System: Features and Operation
The Uconnect system in your 2015 Jeep Cherokee serves as the central hub for entertainment, communication, and vehicle settings. It offers a user-friendly touchscreen interface, allowing easy access to features like Bluetooth connectivity for hands-free calling and audio streaming. You can seamlessly integrate your smartphone for Apple CarPlay or Android Auto compatibility, depending on the trim level.
Navigation functionality, when equipped, provides turn-by-turn directions and real-time traffic updates; The system also supports voice commands, enabling you to control various functions without taking your hands off the wheel. Explore customizable settings for audio preferences, display brightness, and climate control. Refer to your owner’s manual for detailed instructions on pairing devices, utilizing voice commands, and maximizing the Uconnect system’s capabilities. Regular software updates, available through the Uconnect website, ensure optimal performance and access to the latest features.
Navigation System Details
The 2015 Jeep Cherokee’s optional navigation system provides detailed mapping and guidance for your journeys; It features a touchscreen display, offering a clear view of routes, points of interest, and traffic conditions. The system utilizes GPS technology to pinpoint your location and calculate the most efficient routes to your desired destination.
Users can input addresses, search for businesses, or select saved locations. Real-time traffic updates help avoid congestion, dynamically rerouting you to minimize delays. The system also supports voice guidance, providing audible turn-by-turn directions. Map updates are crucial for maintaining accuracy and accessing the latest road information; these can be obtained through the Uconnect website or a dealership. Consult your owner’s manual for specific instructions on system operation, map updates, and troubleshooting common issues. Proper use ensures a smooth and informed driving experience.
Seating and Comfort Features
The 2015 Jeep Cherokee prioritizes passenger comfort with a range of seating and convenience features. Cloth upholstery is standard, with available upgrades to leather for enhanced luxury. Front seats offer ample support and adjustability, while the rear seats provide comfortable seating for three passengers. Available heated front seats and a heated steering wheel add warmth during colder months.
The Cherokee offers a spacious interior for its class, with ample legroom and headroom. Available features include power-adjustable front seats, lumbar support, and a dual-zone automatic climate control system. The rear seats can be folded down to expand cargo space, providing versatility for carrying larger items. Refer to your owner’s manual for detailed instructions on operating these features and maximizing comfort. Proper adjustment and utilization of these features ensure a pleasant driving experience for all occupants.
Maintenance & Service
Consult your 2015 Jeep Cherokee manual for a recommended maintenance schedule, addressing battery issues, heater/evaporator core replacements, and ensuring vehicle longevity.
Recommended Maintenance Schedule
Your 2015 Jeep Cherokee’s manual details a crucial maintenance schedule for optimal performance and reliability. Regular checks, as outlined within, are paramount to preventing costly repairs and ensuring your vehicle’s longevity.
Key intervals include oil and filter changes, typically every 7,500 to 10,000 miles depending on driving conditions and oil type. Tire rotations are recommended every 8,000 miles to promote even wear. Fluid level inspections – coolant, brake fluid, power steering, and transmission – should occur routinely.
Furthermore, the manual specifies inspection of belts, hoses, and filters (air, cabin) at designated mileage points. Spark plug replacement, brake pad inspections, and overall system checks are also vital components of the schedule. Adhering to this schedule, detailed in your 2015 Jeep Cherokee manual, will contribute significantly to a safe and enjoyable driving experience.
Battery Issues & Troubleshooting (Based on 2024 GC Laredo X Reports)
While referencing reports from a 2024 Grand Cherokee Laredo X, concerning battery failures can offer insights applicable to older models like the 2015 Jeep Cherokee. Owners have reported instances of completely drained batteries, registering as low as 3.9V on a multimeter, after periods of inactivity.
Troubleshooting steps, as detailed in your 2015 manual, should begin with verifying proper terminal connections and checking for corrosion. Parasitic draw, where components continue to drain power when the vehicle is off, is a potential cause. A battery load test can determine its overall health.
Consider the age of your battery; typical lifespan is 3-5 years. If issues persist, consult a qualified mechanic. Although the 2024 reports are specific, proactive battery maintenance, guided by your 2015 manual, is crucial for preventing unexpected failures.
Heater Core & Evaporator Core Replacement
Replacing the heater core and evaporator core in your 2015 Jeep Cherokee, while potentially complex, is a manageable repair for experienced DIYers. Multiple auto parts retailers, including AutoZone, NAPA, and Advanced Auto Parts, commonly stock replacement cores, often manufactured by Spectra.
Price comparisons are advisable; Amazon may offer savings, approximately $20 less, but consider shipping times and return policies. Your 2015 manual provides diagrams illustrating the dashboard disassembly required to access these components.
Be prepared for a time-consuming process involving refrigerant evacuation (for the evaporator core) and careful disconnection of hoses and electrical connectors. Consult online repair guides and videos alongside your manual for detailed step-by-step instructions. Proper tools and safety precautions are essential for a successful replacement.

4×4 System & Troubleshooting
The 2015 Jeep Cherokee’s 4×4 system may experience issues; a common fix involves replacing the transfer case actuator, as detailed in extensive online service discussions.
Understanding the 4×4 System
The 2015 Jeep Cherokee offers sophisticated 4×4 capabilities designed for varied terrains and weather conditions. Understanding its operation is crucial for maximizing performance and ensuring safe driving. The system utilizes a transfer case to distribute power between the front and rear axles, providing enhanced traction when needed.
Several 4×4 modes are typically available, including Auto, Lock, and sometimes 4-Low. ‘Auto’ mode automatically engages 4×4 when wheel slippage is detected, offering seamless transition. ‘Lock’ mode forces a 50/50 power split between axles, ideal for challenging off-road situations. 4-Low provides maximum torque for steep inclines or deep obstacles.
The system’s effectiveness relies on a functional transfer case actuator, which controls the transfer case’s operation. Regular inspection and maintenance are vital to prevent issues and maintain optimal 4×4 performance. Familiarize yourself with the system’s indicators and limitations as outlined in the owner’s manual.
Troubleshooting Common 4×4 Issues (Transfer Case Actuator)
A frequent issue reported with the 2015 Jeep Cherokee’s 4×4 system centers around the transfer case actuator. Symptoms include difficulty shifting into or out of 4×4, a clicking noise during operation, or the 4×4 light flashing. These often indicate a failing actuator, responsible for physically engaging the transfer case.
Initial troubleshooting involves checking for any obstructions or damage to the actuator and its wiring. A scan tool can reveal diagnostic trouble codes (DTCs) related to the 4×4 system, pinpointing the actuator as the source. Replacement is often necessary, and it’s a relatively common repair.
Ensure the correct actuator is used for your specific Cherokee model. Following the owner’s manual’s guidance and consulting a qualified mechanic are recommended. Ignoring these issues can lead to further damage to the transfer case, resulting in more costly repairs.

Lift Kits & Modifications
Leveling kits, up to 1.5 inches, primarily address factory rake, leveling the Jeep for improved aesthetics and slight ground clearance gains.
These modifications are relatively simple and cost-effective, enhancing the vehicle’s stance without extensive alterations.
Leveling Kits (Up to 1.5 inches)
A leveling kit, typically limited to a 1.5-inch lift or less, is a popular modification for the 2015 Jeep Cherokee aimed at addressing the factory rake. This factory rake refers to the vehicle’s design where the front sits noticeably lower than the rear, impacting both aesthetics and potentially handling.
These kits generally consist of spacers installed in the front suspension to raise the vehicle’s nose, creating a more level stance. Installation is relatively straightforward, often achievable with basic mechanical skills and readily available online tutorials. The primary benefit is a more balanced appearance, but it also offers a slight increase in front-end ground clearance.
Importantly, a leveling kit doesn’t significantly alter the vehicle’s overall ride quality or off-road capability. It’s more of a cosmetic upgrade with minor functional benefits. Consider tire size when installing a leveling kit, as larger tires can further enhance the lifted look and provide improved traction.
Understanding Vehicle Rake
Vehicle rake describes the intentional slope of a vehicle’s chassis, where the front sits lower than the rear. Many 2015 Jeep Cherokee models exhibit this factory rake due to design considerations related to aerodynamics, weight distribution, and manufacturing tolerances. While not inherently negative, some owners prefer a more level appearance and may choose to address it.
The rake influences the vehicle’s visual profile and can subtly affect handling characteristics. A pronounced rake can sometimes contribute to a “nose-down” appearance, while a level stance often appears more aggressive and balanced. It’s important to understand that the factory rake is engineered into the vehicle for specific reasons.
Modifying the rake, typically through leveling kits, alters the original design parameters. While a slight adjustment is generally safe, significant changes can impact suspension geometry and potentially affect ride quality or handling. Assessing your personal preferences and driving needs is crucial before modifying the vehicle’s rake.

Warranty Information
Obtain your 2015 Jeep Cherokee warranty booklets by contacting your dealership or calling 1-877-426-5337 (US) or 1-800-387-1143 (Canada) for assistance.
Obtaining Warranty Booklets
For first-time retail owners of a 2015 Jeep Cherokee, securing complimentary printed warranty booklets is a straightforward process designed for convenience and peace of mind. Jeep understands the importance of having readily accessible documentation outlining your vehicle’s coverage.
To request these vital booklets – encompassing the Owner’s Manual, Navigation/Uconnect Manuals, and the comprehensive Warranty Booklet itself – you have two primary options. You can directly contact your local authorized Jeep dealership’s service department, who will gladly assist you with your request. Alternatively, you can reach out via telephone to Jeep’s dedicated customer support lines.
Within the United States, dial 1-877-426-5337. For owners located in Canada, please use the number 1-800-387-1143. Be prepared to provide basic vehicle information to verify your eligibility as the original retail owner. These resources ensure you have the necessary documentation to understand and utilize your vehicle’s warranty benefits fully.

Chrysler Equipment Listing Online
Utilize the Chrysler Equipment Listing Online tool to definitively determine the standard equipment originally included with your specific 2015 Jeep Cherokee model.
This resource provides clarity regarding factory features, aiding in understanding your vehicle’s original configuration.

Using the Online Tool to Determine Standard Equipment
The Chrysler Equipment Listing Online is an invaluable resource for 2015 Jeep Cherokee owners seeking precise details about their vehicle’s original factory configuration. This digital tool allows you to input your Vehicle Identification Number (VIN) to access a comprehensive report outlining the standard equipment that came with your specific Cherokee when it was initially manufactured.
This is particularly useful when verifying features, understanding trim levels, or resolving discrepancies regarding included options. The report generated will detail everything from the engine and transmission to interior features, safety systems, and even specific accessories. It’s a definitive source, surpassing general guides or assumptions about what a particular model should have included. Accessing this information empowers owners with accurate knowledge about their vehicle, aiding in maintenance, resale, or simply satisfying curiosity about its original specifications.