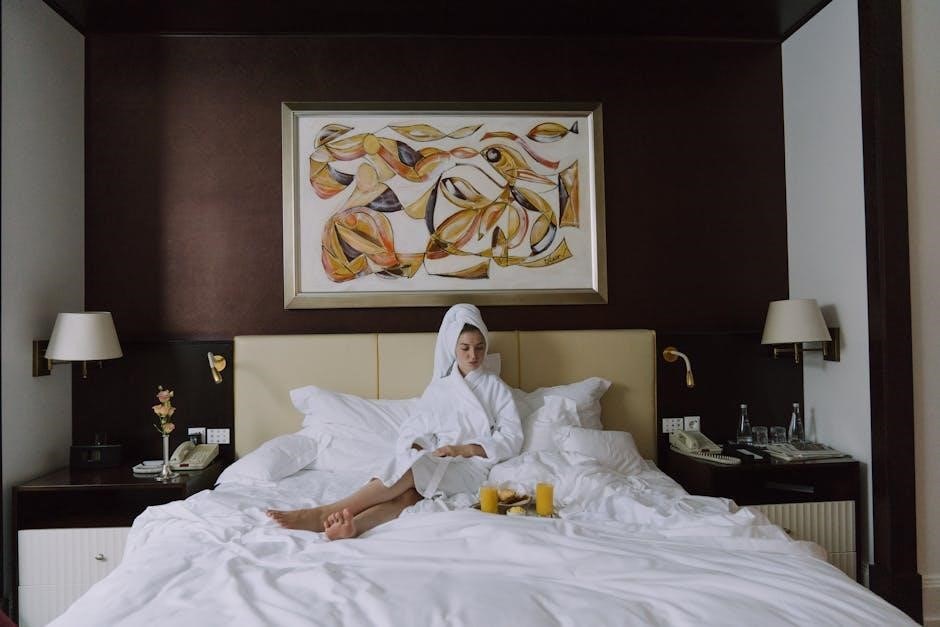
Laura Ashley pillows blend elegance and comfort, offering softness for restful sleep. Most are machine washable, ensuring easy care. Follow specific instructions to maintain quality and durability.
1.1 Overview of Laura Ashley Pillows
Laura Ashley pillows are renowned for their exquisite design, combining elegance with comfort. Crafted from premium materials like 300tc satin striped covers and filled with natural or hollowfibre fillings, they offer unparalleled softness. Available in various sizes, including standard (20×28″) and king (20×36″), these pillows cater to diverse preferences. Many Laura Ashley pillows are machine washable, making maintenance convenient. They often feature embroidery and piping for a sophisticated look. Designed to provide long-lasting comfort, these pillows are ideal for creating a cozy and inviting atmosphere. Their durability and style make them a popular choice for home decor. Proper care, as outlined in their washing instructions, ensures they retain their quality and continue to offer restful sleep.
1.2 Importance of Proper Washing Instructions
Proper washing instructions are crucial for maintaining the quality and longevity of Laura Ashley pillows. Improper washing techniques can damage the fabric, cause colors to fade, or lead to clumping of fillings. Machine washing at 40°C is generally recommended, but always check the care label for specific guidance. Using harsh detergents or high heat settings can harm the materials, while gentle cycles and mild detergents preserve the pillow’s softness and integrity. Following the instructions ensures the pillow retains its shape, remains hygienic, and continues to provide comfort. Neglecting these guidelines can result in irreversible damage, reducing the pillow’s lifespan. Proper care not only maintains its aesthetic appeal but also ensures it remains a haven for restful sleep. Adhering to washing instructions is essential for enjoying the full benefits of your Laura Ashley pillow.
Checking the Care Label
Always check the care label for specific washing instructions, as Laura Ashley pillows may require different methods. Symbols guide machine washing, hand washing, or spot cleaning.
2.1 Understanding the Care Label Symbols
Understanding care label symbols is essential for properly washing your Laura Ashley pillows. These symbols provide clear instructions on washing methods, temperature settings, and drying options. A tub of water with waves indicates machine washing, while a hand in the tub suggests hand washing. A circle signifies dry cleaning, though most Laura Ashley pillows are machine washable. Temperature symbols, like dots, represent degrees—usually 30°C or 40°C for these pillows. A square with a horizontal line means air drying, while a square with a diagonal line indicates tumble drying on a low setting. Always check these symbols to ensure you follow the correct method for your pillow’s specific needs, preserving its quality and longevity. This step prevents damage and ensures your pillow remains comfortable and clean.
2.2 Key Information to Look for on the Label
When examining the care label of your Laura Ashley pillow, look for specific symbols and text that guide washing and drying. Check if the pillow is machine washable, as most models are, and note the recommended temperature, typically 30°C or 40°C. Gentle or delicate cycles are often suggested to protect the fabric and filling. Detergent recommendations may also be specified. Additionally, verify drying instructions, such as air drying or tumble drying on a low setting. Some labels may advise against ironing or bleaching. For filled pillows, check if the filling requires special care, like feather or down maintenance. Always adhere to these guidelines to ensure the pillow retains its quality and comfort. Ignoring label instructions can damage the material or filling, so careful attention is crucial.
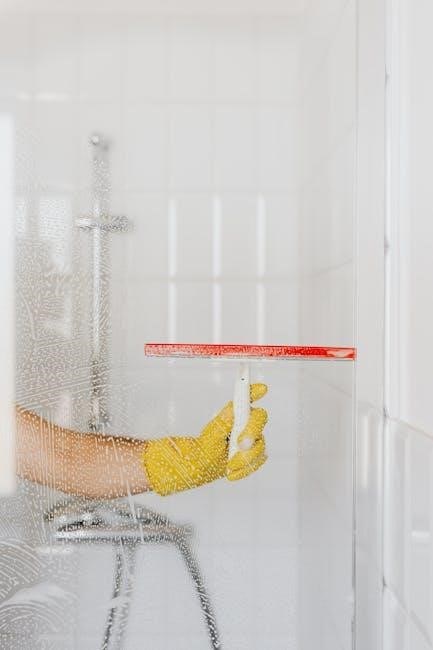
Machine Washing Instructions
Machine washing is suitable for most Laura Ashley pillows at 40°C. Use a gentle cycle with mild detergent. Always check the care label for specific instructions.
3.1 When to Machine Wash Your Laura Ashley Pillow
Machine wash your Laura Ashley pillow when it shows visible stains, emits odors, or feels soiled. Regular washing helps maintain hygiene and comfort. Always check the care label for specific guidance, as some pillows may require delicate handling. For most machine-washable pillows, use a gentle cycle with warm water and mild detergent. Avoid over-washing, as this can degrade the filling and fabric. For lightweight stains, spot cleaning may suffice. If unsure, refer to the manufacturer’s instructions to ensure optimal care and longevity of your pillow. Proper washing practices preserve the pillow’s loft, softness, and aesthetic appeal, ensuring it remains a cozy companion for restful sleep.
3.2 Steps for Machine Washing
Start by checking the care label to confirm machine washing suitability. Place the pillow in a mesh laundry bag for protection. Use a front-loading washer on a gentle cycle with warm water and a mild detergent. Avoid using harsh chemicals or bleach. Once washed, ensure a thorough rinse to remove all detergent residue. For drying, either air dry or tumble dry on a low setting. Remove promptly to prevent over-drying. Reshape the pillow while still damp to maintain its form. Allow it to air dry completely before use. Following these steps ensures your Laura Ashley pillow remains clean, fresh, and retains its comfort and appearance. Proper machine washing helps extend the pillow’s lifespan while keeping it hygienic and cozy for a restful sleep.
3.3 Recommended Detergent for Washing
When machine washing your Laura Ashley pillow, use a mild detergent specifically designed for delicate or sensitive fabrics. Avoid harsh chemicals, bleach, or strong detergents, as they may damage the pillow’s material or filling. Opt for a fragrance-free or hypoallergenic detergent to prevent irritation and maintain the pillow’s softness. For best results, use a gentle cycle with warm water, ensuring the detergent dissolves fully before adding the pillow. Some detergents are formulated for washing down or feather-filled items, making them ideal for Laura Ashley pillows with natural fillings. Always check the detergent label to confirm it’s suitable for the fabric type; Using the right detergent ensures the pillow remains clean, fresh, and retains its luxurious feel, while also protecting its quality and extending its lifespan.
3.4 Caring for Different Filling Types
Laura Ashley pillows come with various fillings, each requiring specific care. For down or feather-filled pillows, use a gentle cycle with a mild detergent to avoid damaging the natural fibers. Hollowfibre and microfibre fillings are more durable but still benefit from a gentle wash to maintain loft. Natural fillings, like cotton, should be washed in cold water to prevent shrinking. Always avoid using bleach or harsh chemicals, as they can degrade the filling materials. For synthetic fills, a delicate cycle with warm water is typically safe. After washing, ensure the pillow is thoroughly rinsed to remove all detergent residue. Proper care for the filling type ensures the pillow retains its shape, comfort, and quality. Refer to the care label for specific recommendations tailored to your pillow’s filling.

Hand Washing Instructions
Hand washing is ideal for delicate or special-care Laura Ashley pillows. Use cold water and mild detergent, gently agitate, rinse thoroughly, and avoid wringing. Air dry flat to maintain shape and comfort.
4.1 When Hand Washing is Necessary
Hand washing is essential for Laura Ashley pillows made of delicate materials, such as silk or special fabrics, or those with intricate embroidery. It is also required for pillows with filling types that may be damaged by machine washing, such as down or feather fillings. Additionally, if the care label specifies “Hand Wash Only” or if the pillow is too large for a standard washing machine, hand washing is the recommended method. Spot cleaning may also lead to full hand washing if the stain is particularly stubborn. Always check the care label first, as some pillows may require dry cleaning instead. Hand washing ensures gentle care, preserving the pillow’s quality and extending its lifespan. It is a meticulous process but necessary for maintaining the elegance and comfort of Laura Ashley pillows.
4.2 Steps for Hand Washing a Laura Ashley Pillow
Hand washing a Laura Ashley pillow requires careful attention to detail to maintain its quality. Start by checking the care label for specific instructions. Fill a basin with cold water and add a mild detergent, avoiding harsh chemicals. Gently submerge the pillow, working the soap into a lather with your hands. Avoid wringing or twisting, as this can damage the filling or fabric. Rinse thoroughly under cold running water to remove all soap residue. Gently squeeze out excess water without wringing. Lay the pillow flat on a clean, dry towel, reshaping it to its original form. Allow it to air dry away from direct sunlight. Do not machine dry or iron. This method ensures the pillow retains its softness and elegance, while preventing damage to delicate materials or fillings.

Drying Instructions
For optimal care, air dry Laura Ashley pillows to maintain shape and loft. Tumble dry on low if necessary, reshape while damp, and avoid direct sunlight.
5.1 Air Drying Your Pillow
Air drying is the recommended method for Laura Ashley pillows to preserve their shape and loft. After washing, gently reshape the pillow while it is still damp. Lay it flat on a clean, dry surface in a well-ventilated area, away from direct sunlight to prevent fading or damage. Avoid stacking other items on top to ensure even drying. Do not rush the process, as air drying may take several hours or overnight. This method ensures the pillow remains plush and maintains its quality. For down or feather-filled pillows, fluff them occasionally to redistribute the filling. Proper air drying is essential for extending the life of your Laura Ashley pillow.
5.2 Tumble Drying on a Low Setting
Tumble drying your Laura Ashley pillow on a low setting is a convenient option, but it requires careful attention to maintain quality. Always check the care label to confirm it is suitable for tumble drying. Use a low heat setting to avoid damaging the filling or shrinking the cover. Remove the pillow immediately after the cycle to reshape it and prevent clumping of the filling. Lay it flat to air dry completely, as residual moisture can lead to mold or mildew. Avoid high heat, as it may degrade the materials. This method is ideal for quick drying but ensure the pillow is thoroughly dry before use to maintain its loft and comfort.
5.3 Ironing Instructions
For Laura Ashley pillows, ironing should be done with caution to preserve their quality. Always check the care label for specific instructions, as some materials may require special handling. If ironing is recommended, use a low heat setting and iron on the reverse side of the cover to avoid direct contact with the fabric’s face. Avoid using steam, as it can damage the filling or cause discoloration. Ironing is best done when the pillow is slightly damp but not soaking wet, as this helps remove wrinkles more effectively. For down or feather-filled pillows, ironing is generally not advised, as it can disrupt the filling. Always allow the pillow to air dry completely before ironing to prevent any moisture-related damage. This ensures the pillow retains its shape and comfort while maintaining its elegant appearance.
5.4 Storage Tips After Washing
Proper storage of your Laura Ashley pillow after washing is essential to maintain its shape and comfort; Ensure the pillow is completely dry before storing to prevent mildew or odors. For machine-washed pillows, gently reshape them while damp to restore their loft. Store the pillow in a cool, dry place away from direct sunlight, which can fade the fabric or damage the filling. Use a breathable storage bag or a cotton pillowcase to allow airflow and protect the pillow from dust. Avoid compressing the pillow tightly, as this can flatten the filling. For feather or down pillows, fluff them thoroughly before storage to maintain their structure. Regularly rotating and fluffing stored pillows will help preserve their shape and ensure long-lasting comfort. Proper storage will keep your Laura Ashley pillow fresh and ready for use whenever needed.
Spot Cleaning Instructions
Spot cleaning is ideal for minor stains on Laura Ashley pillows. Use a mild detergent, gently clean the affected area, and ensure the pillow remains dry to prevent damage.
6.1 When to Spot Clean
Spot cleaning is necessary when minor stains or spills occur on your Laura Ashley pillow. It’s a practical solution for addressing small, localized areas without washing the entire pillow. Always check the care label first to ensure spot cleaning is recommended for your specific pillow type. For most Laura Ashley pillows, spot cleaning is suitable for surface stains like food spills or makeup marks. Use a mild detergent and a clean, damp cloth to gently remove the stain. Avoid over-wetting the pillow, especially if it contains down or feather filling, as moisture can damage the inner material.
Act quickly to prevent stains from setting, and avoid using harsh chemicals or abrasive cleaners that might harm the fabric. Spot cleaning is also ideal for maintaining the pillow’s appearance between washes, helping to preserve its comfort and aesthetic appeal.
6.2 How to Spot Clean Effectively
To spot clean your Laura Ashley pillow effectively, start by checking the care label for any specific recommendations. For most pillows, dampen a clean cloth with cold water and a small amount of mild detergent. Gently scrub the stained area, working from the outside in to prevent the stain from spreading. Avoid using harsh chemicals or excessive water, especially for pillows with down or feather fillings, as this can damage the inner material.
Once the stain is removed, rinse the cloth thoroughly and blot the area to remove excess moisture. Allow the pillow to air dry completely, away from direct sunlight. Avoid rubbing too vigorously, as this may harm the fabric. Spot cleaning helps maintain the pillow’s appearance and extends its lifespan without the need for full washing.
Maintenance Tips
Regularly fluff Laura Ashley pillows to maintain loft and comfort. Use a breathable pillow protector to prevent stains and extend lifespan. Rotate pillows periodically for even wear.
7.1 Fluffing Your Pillow Regularly
Fluffing your Laura Ashley pillow regularly helps maintain its shape and loft, ensuring consistent comfort. For feather or down pillows, fluffing restores the filling’s natural arrangement. For cotton or hollowfibre pillows, this step prevents flat spots and promotes even distribution. Fluff gently but thoroughly, especially after washing or drying. Daily fluffing can revitalize the pillow’s appearance and feel. If your pillow has a removable cover, take it off and fluff the inner filling separately. Regular fluffing also helps prevent clumping and keeps the pillow supportive. Over time, this simple maintenance step extends the pillow’s lifespan and keeps it looking like new. For best results, fluff your pillow every morning and evening to ensure it remains plush and inviting.
7.2 Using a Pillow Protector
Using a pillow protector is an essential step in maintaining the longevity and hygiene of your Laura Ashley pillow. It acts as a protective barrier against spills, stains, and allergens, ensuring your pillow remains clean and fresh. Pillow protectors are especially useful for pillows that are not machine washable or require special care. They can be easily removed and washed, making maintenance simple. Choose a breathable, washable protector to prevent moisture buildup and keep your pillow dry. Regularly washing the protector helps maintain hygiene and prevents the accumulation of dust mites. This extra layer of protection not only preserves the pillow’s quality but also enhances comfort. For optimal care, pair your Laura Ashley pillow with a high-quality protector to enjoy lasting comfort and freshness.
7.3 Rotating the Pillow
Rotating your Laura Ashley pillow is a simple yet effective maintenance step to ensure even wear and longevity. It helps redistribute the filling, preventing lumps and flat spots, while maintaining the pillow’s shape. For optimal results, rotate the pillow every one to two weeks, especially if it’s used frequently. This practice is particularly beneficial for pillows with fiberfill, down, or feather filling, as it ensures the material remains evenly distributed. Regular rotation also prevents the buildup of pressure points, keeping the pillow comfortable and supportive. Over time, this habit will extend the lifespan of your pillow and preserve its quality. By incorporating rotation into your care routine, you can enjoy a consistently restful and rejuvenating sleep experience with your Laura Ashley pillow.
Common Mistakes to Avoid
Common mistakes include over-washing, which degrades materials, using harsh detergents that damage fabrics, and exposing pillows to direct sunlight, causing fading and weakening.
8.1 Over-Washing the Pillow
Over-washing your Laura Ashley pillow can lead to a breakdown of both the filling and the cover materials. Frequent washing, especially in machines, can cause feathers or down to clump, reducing loft and comfort. For fiberfill pillows, over-washing may lead to flattened or uneven filling. The fabric cover may also weaken, losing its softness and potentially fraying. It’s important to wash pillows only when necessary, typically every 3–6 months, depending on usage. Always check the care label for specific guidance. Spot cleaning minor stains is a better alternative to frequent full washes. Preserving the pillow’s integrity ensures long-lasting comfort and maintains its aesthetic appeal. Avoiding over-washing helps extend the lifespan of your Laura Ashley pillow, keeping it fresh and supportive for years to come.
8.2 Using Harsh Detergents
Using harsh detergents when washing your Laura Ashley pillow can damage both the fabric and the filling. Strong chemicals can strip natural fibers, such as down or feathers, of their essential oils, reducing their loft and softness. Additionally, harsh detergents may cause color bleeding or weaken the fabric, leading to fraying or tears. To avoid this, opt for mild detergents specifically designed for delicate or luxury fabrics. Avoid using bleach or fabric softeners, as these can further degrade the materials. Always check the care label for recommended detergents and follow instructions carefully. Using gentle cleaning products ensures the pillow retains its quality and comfort. Remember, harsh detergents can irreversible harm your pillow, so it’s important to choose wisely for long-term durability.
8.3 Exposing the Pillow to Direct Sunlight
Exposing Laura Ashley pillows to direct sunlight can cause significant damage. Prolonged sun exposure may lead to fading of colors, especially in patterned or dyed fabrics. Additionally, direct sunlight can dry out natural fillings like down or feathers, making them brittle and less comfortable. Over time, the fabric may weaken, leading to cracks or tears. To preserve the pillow’s appearance and quality, avoid placing it in direct sunlight for extended periods. If drying is necessary, opt for air drying in a shaded, well-ventilated area or use a low-heat tumble dry setting. Protecting your pillow from direct sunlight ensures its colors remain vibrant and its materials stay intact for a longer lifespan. Always prioritize shaded drying or storage to maintain its luxurious feel and aesthetic appeal.
Proper washing and care ensure Laura Ashley pillows remain comfortable and vibrant. Follow guidelines to maintain quality, extending their lifespan for lasting elegance and restful sleep.
9.1 Summary of Key Washing Instructions
For Laura Ashley pillows, always check the care label first. Most are machine washable at 40°C using a gentle cycle with mild detergent. Avoid harsh chemicals and bleach; Hand washing is recommended for delicate or special-fill pillows. Spot cleaning is ideal for minor stains using a damp cloth with mild soap. Air drying is preferred to maintain shape and loft, though tumble drying on a low setting is possible. Avoid exposing pillows to direct sunlight to prevent fading. Regular fluffing and using a pillow protector can extend lifespan. Follow these guidelines to ensure your Laura Ashley pillows remain soft, clean, and comfortable for years to come.
9.2 Final Tips for Long-Lasting Comfort
To ensure your Laura Ashley pillows remain comfortable and fresh, regularly fluff them to maintain their shape and loft. Use a pillow protector to shield against spills and stains, and wash it frequently; Rotate pillows every few months to distribute wear evenly. Avoid exposure to direct sunlight, as it may cause fading or damage. For machine-washable pillows, stick to gentle cycles and mild detergents to preserve filling integrity. Air drying is ideal, but if tumble drying, use a low setting. Spot clean minor stains promptly to prevent them from setting. By following these care practices, your Laura Ashley pillows will provide long-lasting comfort and maintain their luxurious feel for years to come.