Welcome to the Troy-Bilt Super Bronco Tiller Owner’s Manual, your comprehensive guide to understanding and maintaining your Rear-tine Tiller. This manual covers safety, assembly, operation, and maintenance tips to ensure optimal performance and longevity of your tiller. Read carefully to get the most out of your purchase.

Safety Precautions
Read and follow all safety rules in the manual. Wear protective gear and ensure the area is clear. Handle the tiller properly to prevent accidents and avoid unsafe conditions;
Pre-Operation Checks
Before using your Troy-Bilt Super Bronco Tiller, perform essential pre-operation checks to ensure safe and effective operation. Check the oil level and top it off if necessary. Inspect the tires for proper inflation and the tines for damage or wear. Verify that all bolts and nuts are tightened securely. Ensure the cables and controls are functioning correctly. Clear the area of debris and obstacles. Wear appropriate protective gear, including gloves and safety goggles. Review the manual for specific guidelines tailored to your model. These steps help prevent accidents and ensure your tiller operates efficiently. Always refer to the manual for detailed pre-operation procedures.
Operating Safety Tips
Always wear protective gear, including gloves, safety goggles, and sturdy footwear, when operating the Troy-Bilt Super Bronco Tiller. Ensure the area is clear of debris, children, and pets. Never operate the tiller near water or in wet conditions to avoid electrical hazards. Maintain a firm grip on the handles and stay alert to maintain control. Avoid loose clothing or long hair that could get caught in moving parts. Never leave the tiller unattended while it is running. Be cautious on uneven or sloped terrain to prevent tipping. Follow all warning labels and instructions in the manual. Proper operation ensures safety and efficiency.
Assembly and Setup
Assembly and setup are crucial for safe and effective use. Follow step-by-step instructions for attaching handles and assembling tines. Ensure all bolts are tightened securely. Refer to the parts list for clarity and proper alignment. Double-check the manual for specific torque specifications. Test the tiller on a flat surface before first use.
Assembly Steps
- Begin by carefully unpacking the tiller and inventorying all parts against the provided parts list.
- Attach the handlebars by aligning the bolts with the designated holes and tightening securely.
- Next, assemble the tines by inserting them into the tiller frame and ensuring they are properly secured with the supplied hardware.
- Check all bolts and connections for tightness to prevent loosening during operation.
- Refer to the parts diagram for correct alignment and installation of additional components like the belt drive system.
- Finally, perform a test run on a flat surface to ensure all parts function smoothly before first use.
Always follow the manual’s torque specifications for bolts to avoid damage or safety hazards.
Initial Setup and Preparation
- Before first use, ensure all safety features are intact and functioning properly.
- Check the oil level and fill as necessary, using the recommended type specified in the manual.
- Inspect the tires for proper inflation and adjust to the recommended pressure for optimal traction.
- Align the handlebars correctly and tighten all bolts to prevent vibration loosening during operation.
- Test the throttle and choke controls to ensure smooth engine response.
- Familiarize yourself with the tiller’s balance and maneuverability in a safe, open area.
Proper initial setup ensures safe and efficient operation, maximizing the tiller’s performance and longevity.
Features and Controls
The Troy-Bilt Super Bronco Tiller features a powerful 208cc OHV engine, counter-rotating tines, and a convenient 1-hand operation system with power reverse functionality for easy maneuverability.
Engine Overview
The Troy-Bilt Super Bronco Tiller is powered by a robust 208cc OHV (Overhead Valve) engine, designed for reliable performance and efficient power delivery. This engine features a compact design, reducing overall machine weight while maintaining ample power for tilling tasks. The OHV technology ensures lower emissions and improved fuel efficiency compared to traditional engines. With a strong emphasis on durability, the engine is built to withstand rigorous use in various soil conditions. Proper maintenance, as outlined in the manual, will ensure the engine continues to perform optimally, providing years of dependable service for your gardening needs.
Control Layout and Functionality
The Troy-Bilt Super Bronco Tiller features an ergonomic control layout designed for ease of operation. The handlebar-mounted controls provide intuitive access to key functions, including the engine throttle, power reverse, and tine engagement. The one-hand operation capability allows for precise control and maneuverability, making it easier to navigate tight spaces. The controls are logically arranged to minimize operator fatigue and maximize efficiency during tilling tasks. Clear labels and a user-friendly design ensure that even new users can quickly familiarize themselves with the machine’s operation. This thoughtful control layout enhances the overall tilling experience, combining functionality with comfort for optimal performance.
Operating Instructions
Follow step-by-step guides for starting the engine, engaging the tines, and safely operating the tiller. Proper techniques ensure efficient soil preparation and machine longevity.
Starting the Engine
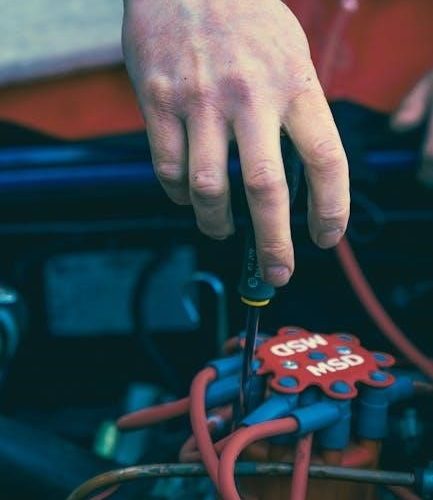
To start the engine, ensure the tiller is on level ground and the transmission is in neutral. Check the controls and ensure the choke is in the correct position. Open the throttle slightly and pull the starter cord firmly until the engine ignites. Allow the engine to warm up briefly before engaging the tines. Always refer to the manual for specific instructions tailored to your model. Proper starting techniques ensure reliable performance. Follow safety guidelines to avoid accidents and maintain optimal function. Familiarize yourself with the process to guarantee smooth operation.
Tilling Techniques and Best Practices
For effective tilling, start by removing debris and marking your garden bed. Engage the tines at a slow pace, working in consistent, overlapping passes. Use the reverse tine feature for tougher soil. Maintain a steady grip on the handlebars and adjust the tilling depth as needed. Avoid over-tilling to prevent soil compaction. Work in small sections, turning the tiller slightly at the end of each pass. Keep the tines clean to ensure proper performance. Proper techniques enhance soil preparation and promote healthy plant growth. Always follow the manual’s guidelines for optimal results and machine longevity.

Maintenance
Regular maintenance ensures your Troy-Bilt Super Bronco Tiller performs optimally. Check and change the oil, clean or replace air filters, and lubricate moving parts as recommended in the manual.
Regular Maintenance Schedule
Keep your Troy-Bilt Super Bronco Tiller in top condition by following the recommended maintenance schedule. Regularly inspect the air filter and replace it every 50 hours of use. Check the oil level before each operation and change it after every 100 hours. Sharpen the tines annually to maintain effective soil preparation. Lubricate pivot points and grease fittings monthly. Inspect belts and cables for wear and tear, replacing them as needed. Store the tiller properly during off-season to protect it from rust and damage. Refer to the manual for specific guidelines and ensure all maintenance is performed safely and correctly.
Seasonal Storage Preparation
Properly prepare your Troy-Bilt Super Bronco Tiller for seasonal storage to ensure it remains in excellent condition. Start by cleaning the entire unit, paying attention to the tines and exterior to remove dirt and debris. Drain the fuel tank or stabilize the fuel with a preservative to prevent degradation. Check and top off the oil levels, and consider changing the oil before storage. Store the tiller in a dry, protected area, such as a garage or shed, to shield it from moisture and pests. Cover the tiller with a breathable cover and ensure all cables and belts are secure. This will help maintain its performance and longevity for the next season.
Troubleshooting
Identify common issues with your Troy-Bilt Super Bronco Tiller, such as engine startup problems or tine malfunction, and find solutions in this section for quick resolution.
Common Issues and Solutions
Experiencing issues with your Troy-Bilt Super Bronco Tiller? This section addresses common problems like engine failure to start, tine jamming, or uneven tilling. Discover practical solutions such as checking fuel levels, cleaning debris from tines, and adjusting tiller depth. Troubleshooting steps guide you through diagnosing and resolving issues efficiently. Refer to the manual for detailed instructions to ensure your tiller operates smoothly and effectively, maintaining your garden’s health and productivity.
Diagnostic Procedures
Diagnosing issues with your Troy-Bilt Super Bronco Tiller involves a systematic approach. Start by identifying symptoms, such as engine stalling or tines not rotating. Check the fuel level, air filter, and spark plug for proper function. Inspect the tines and belts for damage or wear. If the tiller vibrates excessively, ensure all bolts are tightened. For difficulties in starting the engine, refer to the troubleshooting guide in the manual. Regularly check for loose connections or debris buildup. If problems persist, consult the detailed diagnostic steps or contact Troy-Bilt customer support for assistance. Proper diagnostics ensure effective repairs and maintain your tiller’s performance.

Parts and Accessories
Find genuine Troy-Bilt OEM parts and compatible accessories for your Super Bronco Tiller. Ensure optimal performance and longevity by using only approved components as specified in the manual.
OEM Parts and Compatibility
When maintaining or repairing your Troy-Bilt Super Bronco Tiller, always use genuine OEM (Original Equipment Manufacturer) parts to ensure compatibility and performance. These parts are specifically designed for your tiller, guaranteeing safety, efficiency, and durability. Using non-OEM parts may void your warranty or compromise the machine’s functionality. Refer to the parts diagram in your manual to identify the correct components for your model. Verify compatibility by cross-referencing the part number with the manufacturer’s specifications. Only authorized dealers or the Troy-Bilt official website should be used to purchase OEM parts to avoid counterfeit products. This ensures your tiller operates as intended and maintains its longevity.

Storage
Proper storage of your Troy-Bilt Super Bronco Tiller is essential to maintain its condition and ensure longevity. Before storing, clean the tiller thoroughly, removing any dirt or debris from the tines and exterior. Inspect for damage and address any issues to prevent rust or further deterioration. Store the tiller in a dry, secure location, such as a garage or shed, away from direct sunlight and moisture. For long-term storage, drain the fuel tank or add a fuel stabilizer to prevent degradation. Cover the tiller with a breathable cloth to protect it from dust and pests. Always follow the manufacturer’s recommendations for storage to maintain warranty validity and ensure your tiller is ready for the next use.
Warranty Information
Your Troy-Bilt Super Bronco Tiller is backed by a limited lifetime warranty, ensuring protection against defects in materials and workmanship. The warranty covers the tiller’s frame and select components for the product’s lifetime, while other parts may have shorter coverage periods. Registration is required to activate the warranty, and proper maintenance is essential to maintain coverage. For warranty claims, contact Troy-Bilt’s customer support with your product serial number and proof of purchase. The warranty does not cover damage caused by misuse, improper storage, or failure to follow the manual’s instructions. Refer to the warranty section in your manual for detailed terms and conditions.

Downloading the Manual
Downloading the Troy-Bilt Super Bronco Tiller owner’s manual is a convenient and straightforward process. Visit the official Troy-Bilt website or authorized third-party sites to access the manual in PDF format. Ensure you have your model number, as this will help you find the exact manual for your tiller. The manual is free to download and provides detailed information on safety, assembly, operation, and maintenance. Once downloaded, save the PDF for easy reference. This digital version is ideal for quick searches and ensures you always have the guide handy. Downloading the manual is the best way to access comprehensive instructions tailored to your specific model.

Environmental Impact
The Troy-Bilt Super Bronco Tiller is designed with environmental considerations in mind. Its efficient engine and counter-rotating tines minimize soil disturbance, reducing the need for excessive fuel consumption. Regular maintenance, as outlined in the manual, ensures optimal performance and reduces emissions. Proper disposal of waste materials and adherence to eco-friendly practices are encouraged. By following the guidelines in this manual, users can contribute to sustainable gardening practices, reducing their environmental footprint while maintaining a healthy and productive garden. This approach aligns with Troy-Bilt’s commitment to providing durable, eco-conscious equipment for responsible gardening and landscaping activities.

Comparison with Other Models
The Troy-Bilt Super Bronco Tiller stands out among other models with its powerful 208cc OHV engine and counter-rotating tines, offering superior soil preparation. Compared to the standard Bronco model, the Super Bronco features enhanced power and a larger tilling capacity. Its power reverse function, exclusive to this model, provides ease of maneuverability. While other tillers may lack this feature, the Super Bronco delivers unmatched convenience. The Pro-Line model, though similar, does not include the same level of engine power or advanced tine design. This makes the Super Bronco a top choice for heavy-duty gardening tasks, ensuring efficiency and durability for years to come.
Repair Manual
The Repair Manual section provides detailed guidance for diagnosing and fixing common issues with your Troy-Bilt Super Bronco Tiller. It covers troubleshooting techniques, parts replacement, and step-by-step repair procedures. From faulty tines to engine problems, this section ensures you can address malfunctions effectively. Always disconnect the spark plug before attempting repairs. Refer to the parts diagram for accurate identification and ordering of replacement components. Proper tools and safety precautions are emphasized to prevent further damage or injury. Regular maintenance can often prevent the need for major repairs, but when issues arise, this manual offers clear, actionable solutions to get your tiller back in working condition.

Parts Diagram
The Parts Diagram section provides a detailed visual representation of your Troy-Bilt Super Bronco Tiller, allowing you to identify and locate components easily. This section includes exploded views of major assemblies, such as the engine, tine assembly, and transmission, with corresponding part numbers. Use this diagram to identify worn or damaged parts and order replacements. The diagram is compatible with models like the Super Bronco CRT and is cross-referenced with the Repair Manual for maintenance and replacement procedures. It lists 48 parts, including engine components, belts, and tines, ensuring accurate identification and ordering. Refer to this section before performing any repairs or maintenance to ensure you have the correct parts for your tiller.

Technical Specifications
The Troy-Bilt Super Bronco Tiller features a powerful 208cc OHV engine, delivering robust performance for demanding tilling tasks. It boasts a 16-inch tilling width and 10-inch tilling depth, ideal for breaking up compacted soil. The counter-rotating tines are designed for efficient soil turnover, while the self-propelled system with power reverse enhances maneuverability. The tiller weighs approximately 200 pounds, with a sturdy steel frame and durable construction. It includes a 1.5-bushel fuel tank capacity and an adjustable ergonomic loop handle for user comfort. The Super Bronco CRT model also features large 13-inch wheels for better traction and control. These specifications make it suitable for both small and large gardening projects, ensuring reliable and efficient tilling performance.
Customer Support
Troy-Bilt offers comprehensive customer support to ensure your Super Bronco Tiller operates at its best. Visit their official website to download the owner’s manual, parts lists, and troubleshooting guides. For assistance, contact their customer service team via phone, email, or live chat. Authorized service centers are available nationwide for repairs and maintenance. Additionally, Troy-Bilt provides a dedicated warranty program and genuine parts support. Their commitment to customer satisfaction ensures you receive timely help for any inquiries or issues. Whether you need technical advice or parts replacement, Troy-Bilt’s customer support team is ready to assist you effectively.