This comprehensive guide provides detailed instructions for the operation, maintenance, and troubleshooting of Singer sewing machines, ensuring optimal performance and creativity for sewers of all skill levels․
Importance of the Manual
The Singer sewing machine manual is an essential companion for anyone looking to maximize the potential of their machine․ It provides clear, step-by-step instructions for understanding and utilizing the machine’s features, ensuring safety, and troubleshooting common issues․ Whether you’re a beginner or an experienced sewer, the manual offers guidance on setting up the machine, selecting the right stitches, and maintaining proper tension․ It also covers essential maintenance tips, such as cleaning and oiling, to prolong the machine’s lifespan․ Additionally, the manual serves as a valuable resource for accessing advanced features and customizing settings to suit your sewing projects․ By referring to the manual, users can avoid costly mistakes and ensure their Singer sewing machine operates efficiently․ It is a vital tool for anyone aiming to master their sewing skills and create professional-quality results․
Key Features of Singer Sewing Machines
Singer sewing machines are renowned for their versatility and innovative features, designed to enhance sewing efficiency and creativity․ Many models come with automatic needle threaders, saving time and reducing eye strain․ They often include a wide range of built-in stitches, from basic straight and zigzag stitches to decorative and utility stitches․ Adjustable stitch length and width allow for customization to suit various fabrics and projects․ Additionally, Singer machines frequently feature a free-arm design, enabling easy sewing of cuffs, sleeves, and other hard-to-reach areas․ Some models also include a heavy-duty metal frame, ensuring durability and reducing vibration during operation․ Many Singer machines are equipped with LED lighting to illuminate the work area, making it easier to see fine details․ These features collectively make Singer sewing machines adaptable for both beginners and experienced sewers, catering to a variety of sewing needs and projects․

Safety Precautions
Always keep loose clothing tied back and avoid long jewelry․ Ensure the work area is well-lit and free from clutter․ Keep children away and handle sharp objects with care․
General Safety Guidelines
Always operate your Singer sewing machine in a well-lit area, free from clutter․ Ensure loose clothing, long hair, and jewelry are secured to avoid entanglement․ Keep children and pets away while sewing․ Use the machine on a stable, flat surface and avoid overloading it․ Never touch electrical components with wet hands or in damp conditions․ Regularly inspect the power cord and avoid using damaged cords․ Store sharp objects like needles and scissors safely․ Maintain the machine properly to prevent mechanical failure․ Follow the manufacturer’s guidelines for voltage and power usage․ Keep the workspace clean to avoid accidents․ Always unplug the machine when not in use or during maintenance․ Use common sense and caution when handling the machine and its accessories to ensure safe and efficient operation․
Specific Warnings for Singer Machines
When using Singer sewing machines, avoid operating them near open flames or sparks․ Do not use unauthorized attachments, as they may damage the machine or cause injury․ Always use Singer-recommended needles to prevent breakage and potential harm․ Never attempt to oil internal components unless specified in the manual․ Use only Singer-approved bobbins, as others may not fit properly and could cause mechanical issues․ Be cautious when handling sharp objects like the sewing needle or scissors․ Ensure the presser foot is in the correct position to prevent fabric slippage or accidents․ Avoid sewing over metal objects like pins, as they can damage the machine or injure you․ Keep the machine away from direct sunlight to prevent overheating․ Do not leave the machine unattended while it is operational․ Always follow Singer’s guidelines for specific fabric types and thicknesses to maintain optimal performance and safety․
Understanding Your Singer Sewing Machine
Understanding your Singer sewing machine involves familiarizing yourself with its components, such as the bobbin, needles, presser feet, and stitch selectors․ Knowing these parts ensures proper usage, maintenance, and troubleshooting for optimal performance and longevity․
Overview of Machine Components
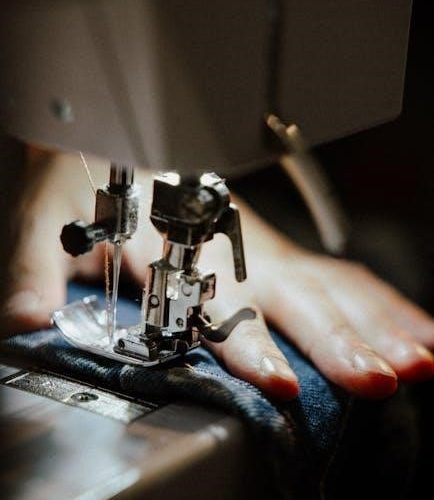
The Singer sewing machine consists of several essential components designed for efficient sewing․ The bobbin holds the lower thread, while the needle moves up and down to create stitches․ The presser foot keeps fabric in place, and the stitch selector allows you to choose different stitch patterns․ The handwheel and motor control the machine’s speed and power․ Understanding these parts is crucial for proper operation and maintenance․ Each component plays a specific role in ensuring smooth stitching and fabric handling․ Familiarizing yourself with their functions will help you use the machine effectively and address any issues that arise․ Proper care and maintenance of these components will extend the life of your Singer sewing machine and ensure optimal performance․
Bobbin, Needles, and Other Essential Parts
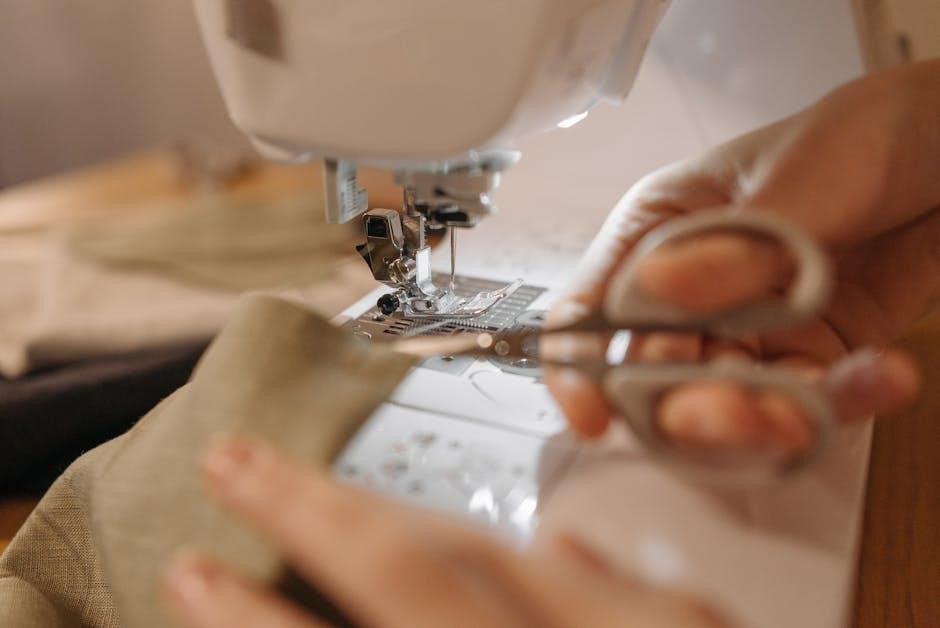
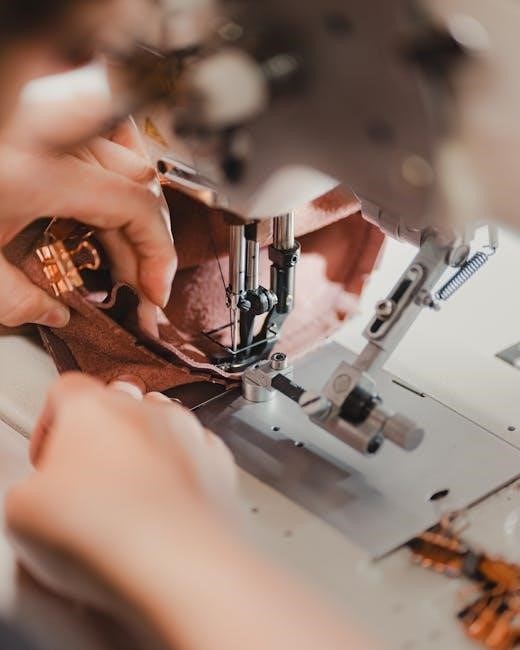
The bobbin is a crucial component that holds the lower thread, ensuring proper stitching․ It must be wound correctly and placed in the bobbin case․ Needles are available in various sizes and types, such as sharp, universal, or heavy-duty, depending on the fabric․ Dull or damaged needles can cause poor stitch quality or fabric damage․ Other key parts include the shuttle hook, which loops the thread, and the take-up lever, which regulates thread tension․ The feed dogs move fabric under the needle, while the stitch plate guides it․ Proper maintenance of these parts ensures smooth operation․ Always use Singer-compatible parts and follow guidelines for replacing needles and bobbins to maintain machine performance and prevent damage․ Regular inspection of these components is essential for troubleshooting and ensuring high-quality stitching․
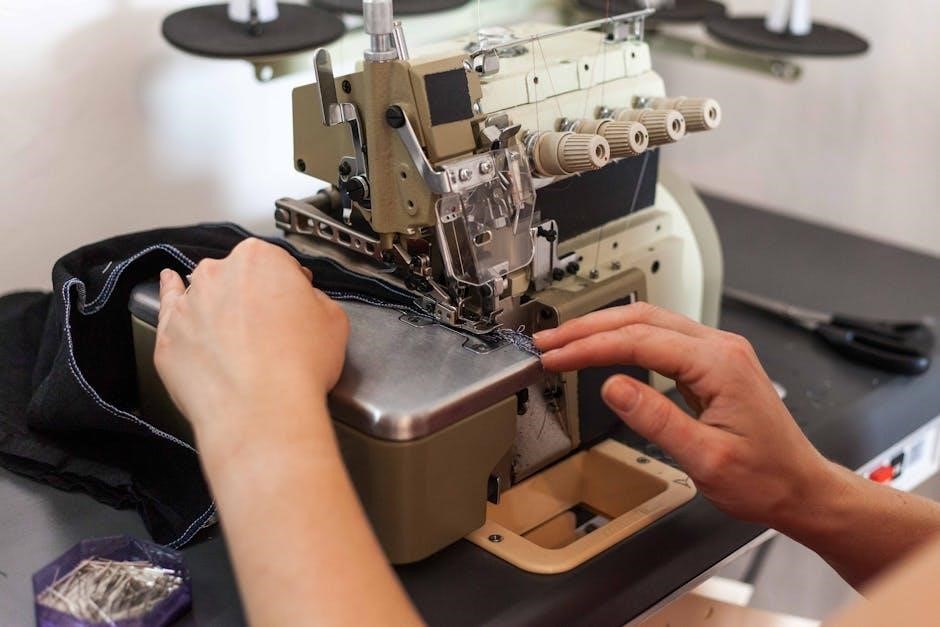
Presser Feet and Their Functions
Presser feet are interchangeable attachments that help guide fabric and perform specific tasks․ The All-Purpose Foot is ideal for straight stitching and general sewing․ The Zipper Foot allows for close sewing along zippers, while the Blind Hem Foot is designed for creating nearly invisible hems․ Other specialized feet include the Walking Foot for heavy fabrics and the Buttonhole Foot for automatic buttonhole stitching․ Each foot is designed to handle specific fabrics or techniques, ensuring better control and precision․ To change presser feet, lift the lever, align the foot with the shank, and snap it into place․ Always use Singer-compatible presser feet for optimal performance․ Regularly clean and store them properly to maintain functionality․ Using the right presser foot enhances stitching quality and simplifies complex tasks․

Setting Up Your Sewing Machine
Ensure your Singer sewing machine is placed on a stable surface, plug it in, and turn it on․ Always check the power cord and presser foot before use․ Adjust the machine settings according to your fabric type for optimal performance․ Proper setup ensures smooth operation and precise stitching․ Follow the manual for specific model requirements to avoid errors․ Regularly check thread tension and bobbin alignment․ A well-set-up machine guarantees professional results․ Keep the workspace clean and organized for efficiency․ Refer to the manual for troubleshooting common setup issues․ Familiarize yourself with controls and functions before starting projects․ Proper setup enhances creativity and productivity․ Always unplug the machine when not in use for safety․ A correctly set-up machine is essential for successful sewing experiences․ Ensure all parts are securely attached and functioning correctly․ Start with a test stitch to verify everything is working properly․ Adjust as needed for perfect results․ Happy sewing!
Threading the Machine
Properly threading your Singer sewing machine is essential for smooth operation․ Begin by turning off the machine and ensuring the presser foot is up․ Locate the spool pin and guide the thread through the tension discs, following the arrows on the machine․ Insert the thread into the take-up lever and pull gently to create slight tension․ Next, thread the needle from front to back, leaving a small tail․ For Singer machines with an automatic needle threader, press the lever to guide the thread through the needle eye․ Always use high-quality thread suitable for your fabric type; Avoid crossing or overlapping threads, as this can cause tangles․ If threading is uneven or the machine jams, rethreading may be necessary․ Keep the thread at a steady tension to ensure consistent stitching․ Refer to your Singer manual for specific threading diagrams tailored to your model․ Proper threading ensures optimal performance and prevents common sewing issues․
Winding and Inserting the Bobbin
Winding and inserting the bobbin correctly is crucial for proper stitching․ Start by placing an empty bobbin on the bobbin winder, typically located on the top right of the machine․ Thread the machine as described in the threading section, then guide the thread through the bobbin winder tension guide․ Begin winding the bobbin by rotating the handwheel or pressing the foot pedal․ Ensure the thread winds evenly and not too tightly or loosely․ Once wound, cut the thread, leaving a small tail․ To insert the bobbin, open the bobbin case, located under the sewing surface, and place the bobbin inside, aligning the notch with the case․ Gently pull the thread tail through the slot to secure it․ Close the bobbin case and test the tension by gently tugging the thread․ Proper bobbin insertion ensures smooth stitching and prevents thread breakage․ Always refer to your Singer manual for model-specific instructions․
Adjusting Tension and Settings
Proper tension and settings are essential for achieving even stitches․ To adjust the top thread tension, locate the tension dial on your Singer machine, usually found on the front or top․ Turn the dial clockwise to tighten or counterclockwise to loosen the thread․ For bobbin tension, gently pull the thread from the bobbin case to check resistance; if it’s too tight or loose, adjust the small screw on the bobbin case (refer to your manual for exact location)․ After making adjustments, test the stitches on a scrap fabric to ensure balance․ Additionally, stitch length and width can be adjusted using the controls on the machine’s panel․ Longer stitches are suitable for heavier fabrics, while shorter stitches are better for delicate materials․ Always tweak one setting at a time and test the results․ Consulting your Singer manual for specific guidance ensures optimal performance tailored to your machine model․
Basic Sewing Operations
Master foundational sewing skills with your Singer machine, starting with threading, fabric selection, and stitch type․ Begin with straight stitches, gradually exploring zigzag and decorative patterns for versatile projects․
Starting Your First Sewing Project
Begin by gathering your materials, including fabric, thread, and scissors․ Plug in your Singer machine and ensure it’s placed on a stable surface․ Always wear safety glasses and keep loose clothing tied back․ Set the machine to a straight stitch, suitable for most fabrics․ Thread the machine carefully, following the guide on the manual․ Place a scrap piece of fabric under the presser foot to test the stitch length and tension․ Once satisfied, align your fabric edges and gently guide it under the needle․ Start sewing slowly, maintaining steady control․ Backstitch at the beginning and end to secure your stitches․ Practice on scrap fabric before working on your actual project to build confidence and skill․ This step-by-step approach ensures a smooth start to your sewing journey with your Singer machine․
Selecting the Right Stitch Type
Selecting the right stitch type is crucial for achieving professional results․ Singer sewing machines offer various stitches, each designed for specific tasks․ For straight-line sewing, use the straight stitch (1)․ The zigzag stitch (2) is ideal for stretchy fabrics or preventing fraying․ The blind hem stitch (10) is perfect for invisible hems on pants or curtains․ Decorative stitches, like the satin stitch (6), add aesthetic value to your projects․ Always consider the fabric type and project requirements when choosing a stitch․ Heavy-duty fabrics may need a heavier stitch, while delicate fabrics require finer ones․ Experiment with different stitches on scrap fabric to ensure compatibility․ Refer to the stitch chart in your Singer manual for guidance on selecting the appropriate stitch for your needs․ Proper stitch selection enhances both the durability and appearance of your sewing projects․
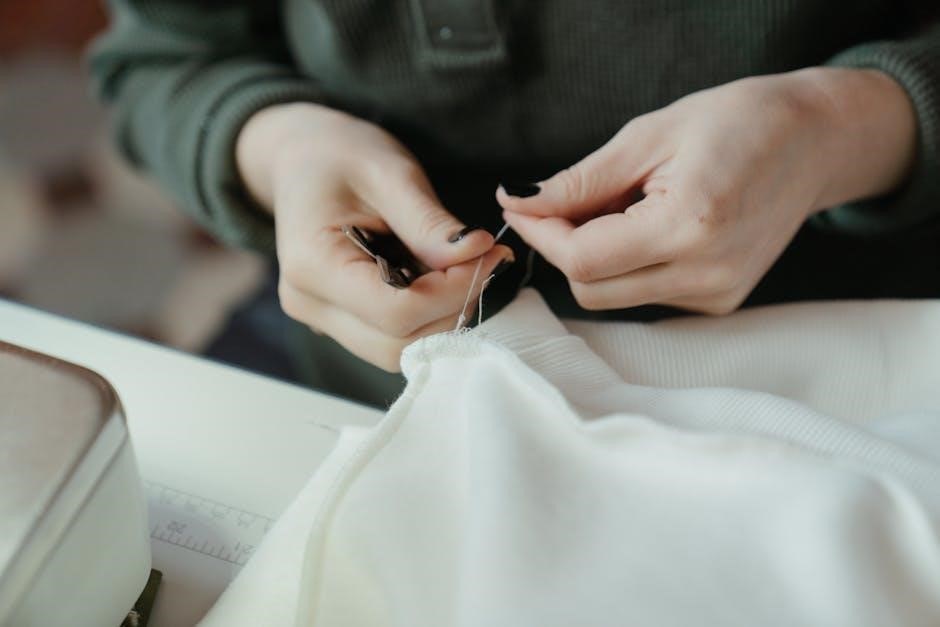
Backstitching and Securing Stitches
Backstitching is a fundamental technique to ensure strong and secure seams․ Begin by sewing forward a few stitches, then reverse to create a backstitch․ This prevents unraveling at the start and end of your seam․ Singer machines often have a built-in backstitch feature, making this process effortless․ Always backstitch at intersections or stress points for added durability․ For extra security, tie off loose thread ends manually or use a sewing needle to weave them through the fabric․ Steam pressing after sewing helps set the stitches and flattens the seam․ For delicate fabrics, a smaller backstitch is recommended to avoid visible damage․ On heavy-duty fabrics, a longer backstitch ensures strength․ Proper backstitching and securing techniques are essential for professional-looking results and long-lasting garments․ Always refer to your Singer manual for specific backstitch settings on your machine model․
Advanced Features and Techniques
Singer sewing machines offer advanced features like special stitches, automatic threading, and customizable settings, providing precision and efficiency for intricate sewing projects and creative designs․
Using Special Stitches and Patterns
Singer sewing machines come equipped with a variety of special stitches and patterns designed to enhance creativity and versatility in sewing projects․ These include decorative stitches like floral patterns, scallops, and geometric designs, as well as functional stitches such as stretch stitches for knits and heavy-duty stitches for thick fabrics․ To use these stitches, simply select the desired option using the stitch selector dial or digital screen, depending on your machine model․ Adjust the stitch length and width as needed for optimal results․ For patterns, some models allow you to combine stitches or create custom sequences, enabling you to tailor your designs to specific fabrics or projects․ Always refer to the stitch chart or digital manual for guidance on selecting the right stitch for your material․ Experimenting with these features can add professional finishes and unique touches to your sewing creations․
Sewing Buttonholes and Zippers
Singer sewing machines make sewing buttonholes and zippers straightforward with specialized feet and settings․ For buttonholes, use the automatic buttonhole foot, which ensures precise alignment and consistent stitching․ Place your fabric under the foot, aligning the buttonhole marking with the foot’s guide․ Select the buttonhole stitch type and let the machine create perfect holes․ For zippers, attach the zipper foot to handle bulky seams and provide clear access to the zipper teeth․ Position the zipper under the foot, starting at the bottom stop, and sew in place using a straight stitch or zigzag for reinforcement․ Always backstitch at the beginning and end for security․ These features allow for professional-looking results, whether adding functional closures or decorative elements to your projects․
Customizing Stitch Length and Width
Customizing stitch length and width on your Singer sewing machine allows for tailored results based on fabric type and project needs․ Use the stitch length dial or button to adjust the distance between stitches, typically ranging from 0․1mm to 5mm․ For stitch width, utilize the width adjustment dial or button, which varies depending on the machine model, usually from 0mm to 7mm․ Longer stitches are ideal for thick fabrics, while shorter ones suit delicate materials․ Wider stitches enhance visibility for decorative sewing, while narrower ones are perfect for precision work․ Always test adjustments on scrap fabric before sewing your final project to ensure the desired effect․ This feature ensures versatility, making Singer machines suitable for a wide range of sewing tasks․ Adjusting these settings can significantly enhance both functionality and aesthetics in your creations․

Maintenance and Troubleshooting
Maintenance and troubleshooting are crucial for prolonging the life of your Singer sewing machine․ Regular cleaning and oiling prevent dust buildup and ensure smooth operation․ Troubleshooting common issues like thread jams or uneven stitches ensures optimal performance and machine reliability․
Cleaning and Oiling the Machine
Cleaning and oiling your Singer sewing machine are essential for maintaining its performance and longevity․ Start by turning off and unplugging the machine․ Use a soft-bristled brush or lint remover to gently sweep away dust, thread fragments, and debris from the bobbin area, stitch plate, and tension discs․ Regularly cleaning these parts prevents fabric from catching or dragging during sewing․
Next, apply a few drops of high-quality sewing machine oil to the oil ports or moving parts, as indicated in your specific model’s manual․ Avoid over-oiling, as excess can attract dust and cause clogs․ Gently run the machine without fabric to distribute the oil evenly․ Repeat this process every 1-3 months or after heavy use to ensure smooth operation and prevent mechanical wear․
For external cleaning, use a damp cloth to wipe down the machine’s surface, avoiding any openings․ Regular maintenance helps extend the life of your Singer sewing machine and ensures consistent stitching quality․
Common Issues and Solutions
If your Singer sewing machine encounters issues, troubleshooting can often resolve them․ A common problem is uneven stitching, which may result from incorrect tension settings or a dull needle․ Adjust the tension discs or replace the needle to fix this․ Thread bunching underneath fabric usually indicates improper threading or a dirty machine; rethread the machine and clean the bobbin area thoroughly․
Jammed machines often occur due to tangled threads or forgotten needles․ Turn off the machine, gently remove the fabric, and clear any debris․ Broken needles can cause damage, so always use the correct needle type for your fabric․ If the machine won’t power on, check the power cord and ensure it’s properly plugged in․ For persistent issues, consult the manual or contact Singer support for assistance․
Resetting the Machine to Factory Settings
Resetting your Singer sewing machine to factory settings can resolve software-related issues or revert customizations․ To do this, press and hold the Setup and Threader buttons simultaneously for 5-7 seconds․ Release when the machine beeps or the screen prompts confirmation․ This action will erase all custom stitch settings, tension adjustments, and saved preferences, restoring the machine to its original factory configuration․
After resetting, the machine will restart automatically․ Ensure all custom stitches are saved before resetting, as they will be lost․ If unsure, refer to your manual for model-specific instructions․ Resetting is a useful troubleshooting step when experiencing persistent issues or transferring ownership․

Accessories and Attachments
Singer sewing machines offer a variety of accessories like presser feet, bobbins, and needles, designed to enhance functionality for different fabrics and sewing tasks, ensuring professional results․
Essential Accessories for Singer Machines
Equipping your Singer sewing machine with the right accessories can significantly enhance your sewing experience․ Essential accessories include a variety of presser feet, such as the zigzag foot, zipper foot, and blind hem foot, which cater to different sewing tasks․ Additional bobbins and needles are must-haves to ensure uninterrupted stitching․ A seam ripper is handy for correcting mistakes, while a lint brush and oil can help maintain the machine’s performance․ Singer also offers specialized attachments, like the buttonhole maker and walking foot, designed for intricate or heavy-duty projects․ Optional accessories, such as an extension table or carrying case, add convenience․ These tools not only expand the machine’s functionality but also make sewing more efficient and enjoyable for both beginners and experienced sewists․
Using Presser Feet for Different Fabrics
Presser feet are essential accessories for Singer sewing machines, designed to handle various fabrics and sewing tasks efficiently․ The all-purpose foot is ideal for straight stitching on cotton, polyester, and blends․ For heavier fabrics like denim or canvas, the heavy-duty foot provides extra grip and stability․ Delicate materials such as silk or chiffon require the Teflon foot, which glides smoothly without damaging the fabric․
- The zipper foot is perfect for sewing zippers and piping, allowing precise alignment․
- The walking foot is designed for quilting and thick layers, ensuring even feeding of fabric․
- The buttonhole foot simplifies creating buttonholes with automatic stitching․
Always match the presser foot to the fabric and task for optimal results․ Experimenting with different feet can enhance your sewing experience and open up new creative possibilities․
Downloading and Using the Manual
Downloading the Singer sewing machine manual is straightforward․ Visit the official Singer website, select your model, and download the PDF․ Utilize bookmarks and search features for easy navigation․ Ensure to download the correct version for your machine model to access accurate instructions and troubleshooting guides․
Finding the Right Manual for Your Model
Locating the correct Singer sewing machine manual is crucial for optimal performance and troubleshooting․ To find the right manual, start by identifying your machine’s model number, typically located on the base or rear side․ This number is essential for downloading the precise guide tailored to your device․ Visit the official Singer website, which offers a dedicated section for manuals․ Enter your model number in the search bar to access the digital version․ If the manual isn’t available online, check authorized Singer dealers or sewing supply stores․ Additionally, online marketplaces like eBay or specialized forums may have scanned copies․ Always verify the manual’s authenticity to ensure compatibility with your specific model․ For older models, reach out to Singer’s customer support for assistance․ Having the correct manual ensures you can troubleshoot issues and maintain your machine effectively․
Navigating the Digital Version of the Manual
Navigating the digital version of the Singer sewing machine manual is designed to be intuitive and user-friendly․ The manual is typically provided in PDF format, which can be viewed on computers, tablets, or smartphones․ Most digital manuals include a table of contents with hyperlinked sections, allowing quick access to specific topics; Users can also use the search function to find keywords or phrases, making it easier to locate information․ Additionally, zoom features enable users to enlarge text or images for better readability․ Some digital manuals may include bookmarks or thumbnails for easy navigation between pages․ By familiarizing yourself with these tools, you can efficiently find the information you need to operate and maintain your Singer sewing machine effectively․
- Use the table of contents for quick access to sections․
- Utilize the search function to find specific keywords․
- Zoom in on text or images for clarity․
- Save bookmarks for frequently referenced pages․
These features ensure a seamless experience when using the digital manual․