PWK Carburetor Manual⁚ A Comprehensive Guide
This comprehensive guide delves into the intricacies of PWK carburetors, covering their types, features, jetting, installation, troubleshooting, and more. Whether you’re a seasoned mechanic or a novice, this manual will equip you with the knowledge needed to optimize your PWK carburetor for peak performance.
Introduction to PWK Carburetors
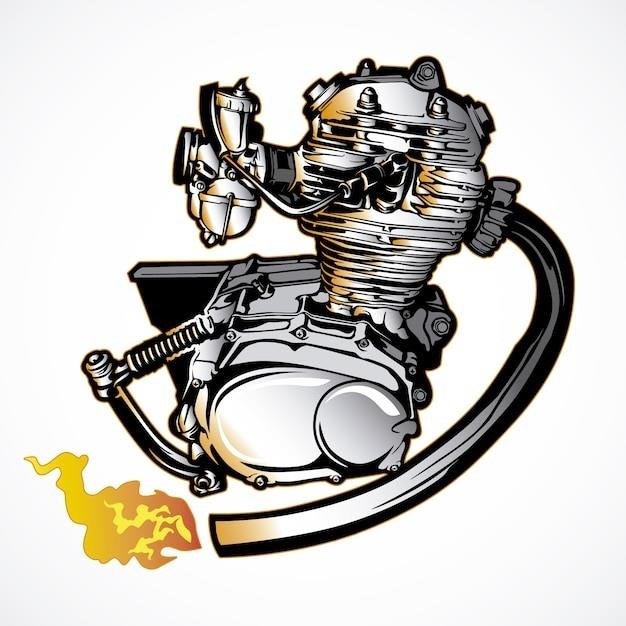
PWK carburetors, renowned for their performance and versatility, are a staple in the world of high-performance motorcycles and off-road vehicles. These flat-slide carburetors, designed and manufactured by Keihin, are renowned for their precise fuel delivery, exceptional throttle response, and ability to handle high horsepower outputs. PWK carburetors are widely used in a variety of applications, including motocross, supercross, road racing, and even ATV and scooter modifications. Their reputation for delivering exceptional performance makes them a popular choice among racers and enthusiasts seeking to maximize their engine’s power and efficiency.
The PWK carburetor’s design features a unique flat slide, which allows for a more efficient and consistent airflow compared to traditional round-slide carburetors. This flat-slide design contributes to the PWK’s ability to deliver precise fuel-air mixture at various engine speeds and loads, resulting in smooth throttle response and optimal power delivery. Furthermore, the PWK’s modular design allows for easy tuning and customization, enabling users to fine-tune their carburetor to specific engine requirements and riding conditions.

This manual will guide you through the intricacies of PWK carburetors, covering their different types, features, jetting, installation, maintenance, and troubleshooting. By understanding the fundamentals of PWK carburetor operation, you can unlock the full potential of your engine and achieve optimal performance.
Types of PWK Carburetors
PWK carburetors come in a variety of sizes and configurations, each designed to cater to specific engine displacements and performance requirements. Understanding the different types of PWK carburetors available is crucial for selecting the right model for your application.
The most common PWK carburetor sizes range from 21mm to 38mm, with each size corresponding to the bore diameter of the carburetor’s venturi. Larger bore sizes typically handle larger engine displacements and higher horsepower outputs. For instance, a 28mm PWK carburetor is commonly used on 125cc two-stroke engines, while a 34mm PWK might be preferred for a 250cc four-stroke engine.
In addition to size, PWK carburetors are also available in various configurations, such as the standard PWK, the PWK Air Striker, and the PWK Flat Slide. The Air Striker model features a unique air intake system that helps to improve airflow and throttle response, making it a popular choice for high-performance applications. The Flat Slide model, as the name suggests, incorporates a flat slide instead of a round one, offering smoother airflow and improved performance at high RPMs.
Choosing the right PWK carburetor for your engine is essential for achieving optimal performance. Consider factors such as engine displacement, horsepower, riding style, and desired performance characteristics when selecting a PWK model.
PWK Carburetor Features and Specifications
PWK carburetors are renowned for their robust construction, innovative design, and exceptional performance. Their key features and specifications contribute significantly to their popularity among performance-oriented riders.
One of the prominent features of PWK carburetors is their high-quality construction. They are typically manufactured from durable aluminum, ensuring strength and longevity. The carburetor body is often die-cast and then CNC-milled for precision and accuracy in the intake channels. The throttle slide is also made from aluminum, contributing to smooth operation and durability.
PWK carburetors boast several design elements that enhance performance. These include a flat slide for optimized airflow, a socket flange for secure mounting, and a wide range of jetting options to fine-tune fuel delivery. The flat slide design helps to reduce turbulence in the airflow, promoting efficient fuel atomization and combustion.
The specifications of PWK carburetors vary depending on the size and model. However, key specifications include the venturi bore diameter, flange connection diameter, air filter connection diameter, and standard jetting settings. These specifications are essential for selecting the correct PWK carburetor for your engine and for determining the appropriate jetting for optimal performance.
PWK Carburetor Jetting and Tuning
Proper jetting is paramount for achieving optimal performance from a PWK carburetor. Jetting refers to the process of selecting the correct combination of jets to ensure the proper fuel-air mixture enters the combustion chamber. The goal is to strike a balance between fuel richness and leanness for optimal power, throttle response, and engine health.
PWK carburetors typically come with a set of standard jets, but these may not be ideal for your specific engine setup. The jetting process involves adjusting the main jet, pilot jet, needle jet, and needle clip position. The main jet controls fuel flow at higher engine speeds, while the pilot jet governs fuel flow at idle and low engine speeds. The needle jet and needle clip position determine fuel flow at intermediate engine speeds.
Tuning a PWK carburetor involves a systematic process of adjusting jetting and observing the engine’s response. It’s important to start with the stock jetting and make adjustments gradually, testing the engine’s performance after each change. The goal is to achieve a smooth, consistent idle, crisp throttle response, and optimal power throughout the engine’s operating range.
Proper tuning can lead to increased horsepower, improved fuel economy, and reduced emissions. However, it’s crucial to avoid running the engine too lean, as this can cause engine damage.
Installing and Maintaining a PWK Carburetor
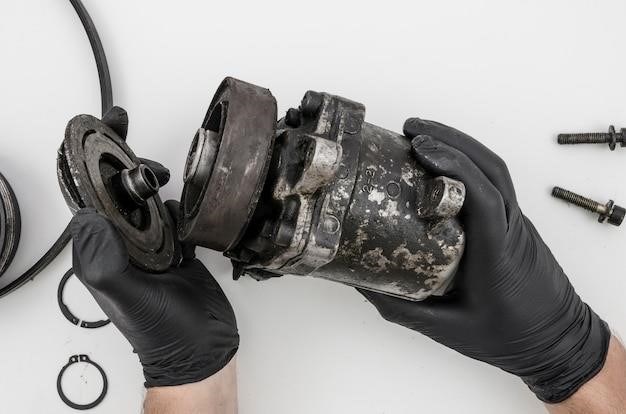
Installing a PWK carburetor requires careful attention to detail and proper tools. Begin by removing the old carburetor and inspecting the intake manifold for any damage or debris. Clean the intake manifold thoroughly and ensure a tight seal when installing the new carburetor.
When mounting the PWK carburetor, make sure the throttle cable is properly routed and adjusted for smooth operation. Connect the fuel line securely to the carburetor, ensuring no leaks. Install the air filter and airbox, ensuring proper airflow and sealing.
Once installed, it’s crucial to properly synchronize the throttle cables to ensure smooth and responsive throttle action. This involves adjusting the throttle cable length to achieve equal movement of the throttle plates on both carburetors (if running multiple carburetors).
Regular maintenance of the PWK carburetor is essential for optimal performance and longevity. This includes cleaning the carburetor regularly to remove dirt and debris, replacing worn-out parts like gaskets and O-rings, and ensuring proper jetting for your engine setup.
By following these steps, you can ensure a proper installation and maintain the performance of your PWK carburetor. Remember to refer to the specific instructions provided with your carburetor model for detailed installation and maintenance procedures.
Troubleshooting Common PWK Carburetor Issues
While PWK carburetors are renowned for their performance and reliability, they can sometimes encounter issues. Understanding common problems and their solutions can save you time and frustration. One frequent problem is a rough idle or stalling, often caused by incorrect jetting, a dirty carburetor, or a vacuum leak.
A lean fuel mixture can cause a high-pitched engine whine, hesitation during acceleration, or even engine overheating. In contrast, a rich mixture might lead to black smoke from the exhaust, a sluggish engine response, and increased fuel consumption.
If you experience difficulty starting the engine, check the fuel supply, fuel lines, and fuel filter for blockages. Ensure that the carburetor is receiving a sufficient amount of fuel. Also, inspect the spark plug for proper function and wear.
A sputtering or backfiring engine might indicate a faulty ignition system, a problem with the carburetor float level, or an air leak in the intake manifold. Inspect the carburetor float level, the throttle cable for proper adjustment, and the intake manifold for cracks or leaks.
For any persistent issues, consulting a reputable mechanic specializing in carburetor tuning can provide valuable insights and solutions. Remember to always exercise caution when working with gasoline and electrical components.
Popular PWK Carburetor Manufacturers
Several reputable manufacturers specialize in producing high-quality PWK carburetors, each with its own strengths and characteristics. Keihin, a Japanese company renowned for its motorcycle and powersports components, is a prominent manufacturer of PWK carburetors. They are known for their precision engineering, durability, and performance.
Nibbi, another established company, offers a wide range of PWK carburetors for various applications. Their products are often praised for their affordability and compatibility with various engines. JRC Engineering, a British company with a long history in the motorcycle industry, also produces PWK carburetors. Their focus on quality and customization makes their products popular among enthusiasts.
UMA Racing, a company specializing in performance parts for motorcycles, offers a range of PWK carburetors designed for increased power and efficiency. Their products are often chosen by racers and performance-oriented riders.
When choosing a PWK carburetor, consider the manufacturer’s reputation, the specific model’s specifications, and its compatibility with your engine. Research and compare options to find the best fit for your needs.
PWK Carburetor Resources and Manuals
Finding comprehensive resources and manuals for PWK carburetors is essential for understanding their workings, troubleshooting issues, and performing maintenance. Several online platforms and manufacturers offer valuable information and guides. Online forums dedicated to motorcycles and powersports often have threads and discussions about PWK carburetors, where users share their experiences, tips, and troubleshooting advice.
Manufacturer websites, such as Keihin and Nibbi, often provide downloadable manuals and technical documentation for their PWK carburetors. These resources typically cover the carburetor’s specifications, jetting, installation, and maintenance procedures. Some manufacturers, like Nibbi, also offer PDF manuals for their PWK, PE, PWN, and FCR carburetors, which can be a valuable resource for users.
Online marketplaces like eBay and Amazon can be useful for finding PWK carburetor manuals, though it’s essential to verify the source and accuracy of the information. Additionally, specialized online retailers that cater to motorcycle and powersports enthusiasts often have sections dedicated to PWK carburetors and related resources.
PWK Carburetor Applications and Uses
PWK carburetors find widespread application in a variety of high-performance engines, particularly in the realm of motorcycles and powersports. Their popularity stems from their ability to deliver precise fuel delivery and exceptional throttle response, crucial for achieving optimal power and performance.
PWK carburetors are commonly used in motocross, off-road, and street bikes, where their ability to handle high engine speeds and demanding riding conditions is paramount. They are also employed in various other powersports applications, including ATVs, dirt bikes, and go-karts.
The versatility of PWK carburetors extends beyond motorcycles. They are also utilized in various other engine applications, including small engines, lawnmowers, and generators. Their tunability and ability to deliver precise fuel-air mixtures make them suitable for optimizing performance across a wide range of applications.
The Importance of a Well-Tuned PWK Carburetor
A well-tuned PWK carburetor is the cornerstone of achieving peak performance from your engine. Proper jetting and tuning ensure the optimal fuel-air mixture, leading to increased power, improved throttle response, smoother running, and reduced emissions.
A mis-tuned PWK carburetor can lead to a range of issues, including poor acceleration, hesitation, stalling, and excessive fuel consumption. It can also result in engine damage if the mixture is too lean, leading to overheating and detonation.
Investing the time and effort in properly tuning your PWK carburetor is crucial for maximizing engine performance and longevity. By understanding the principles of jetting and tuning, you can unlock the true potential of your engine and enjoy a rewarding and enjoyable riding experience.